 You can now insert your Mailchimp forms into a page in the CMS, in the normal page tempalte or the landing page template.
You just need to create your form first in your Mailchimp account, and connect it with your MC account. The submissions for the form will go directly to your database in Mailchimp, not in the CMS.
FOLLOW THESE INSTRUCTIONS:
1. Create a new container
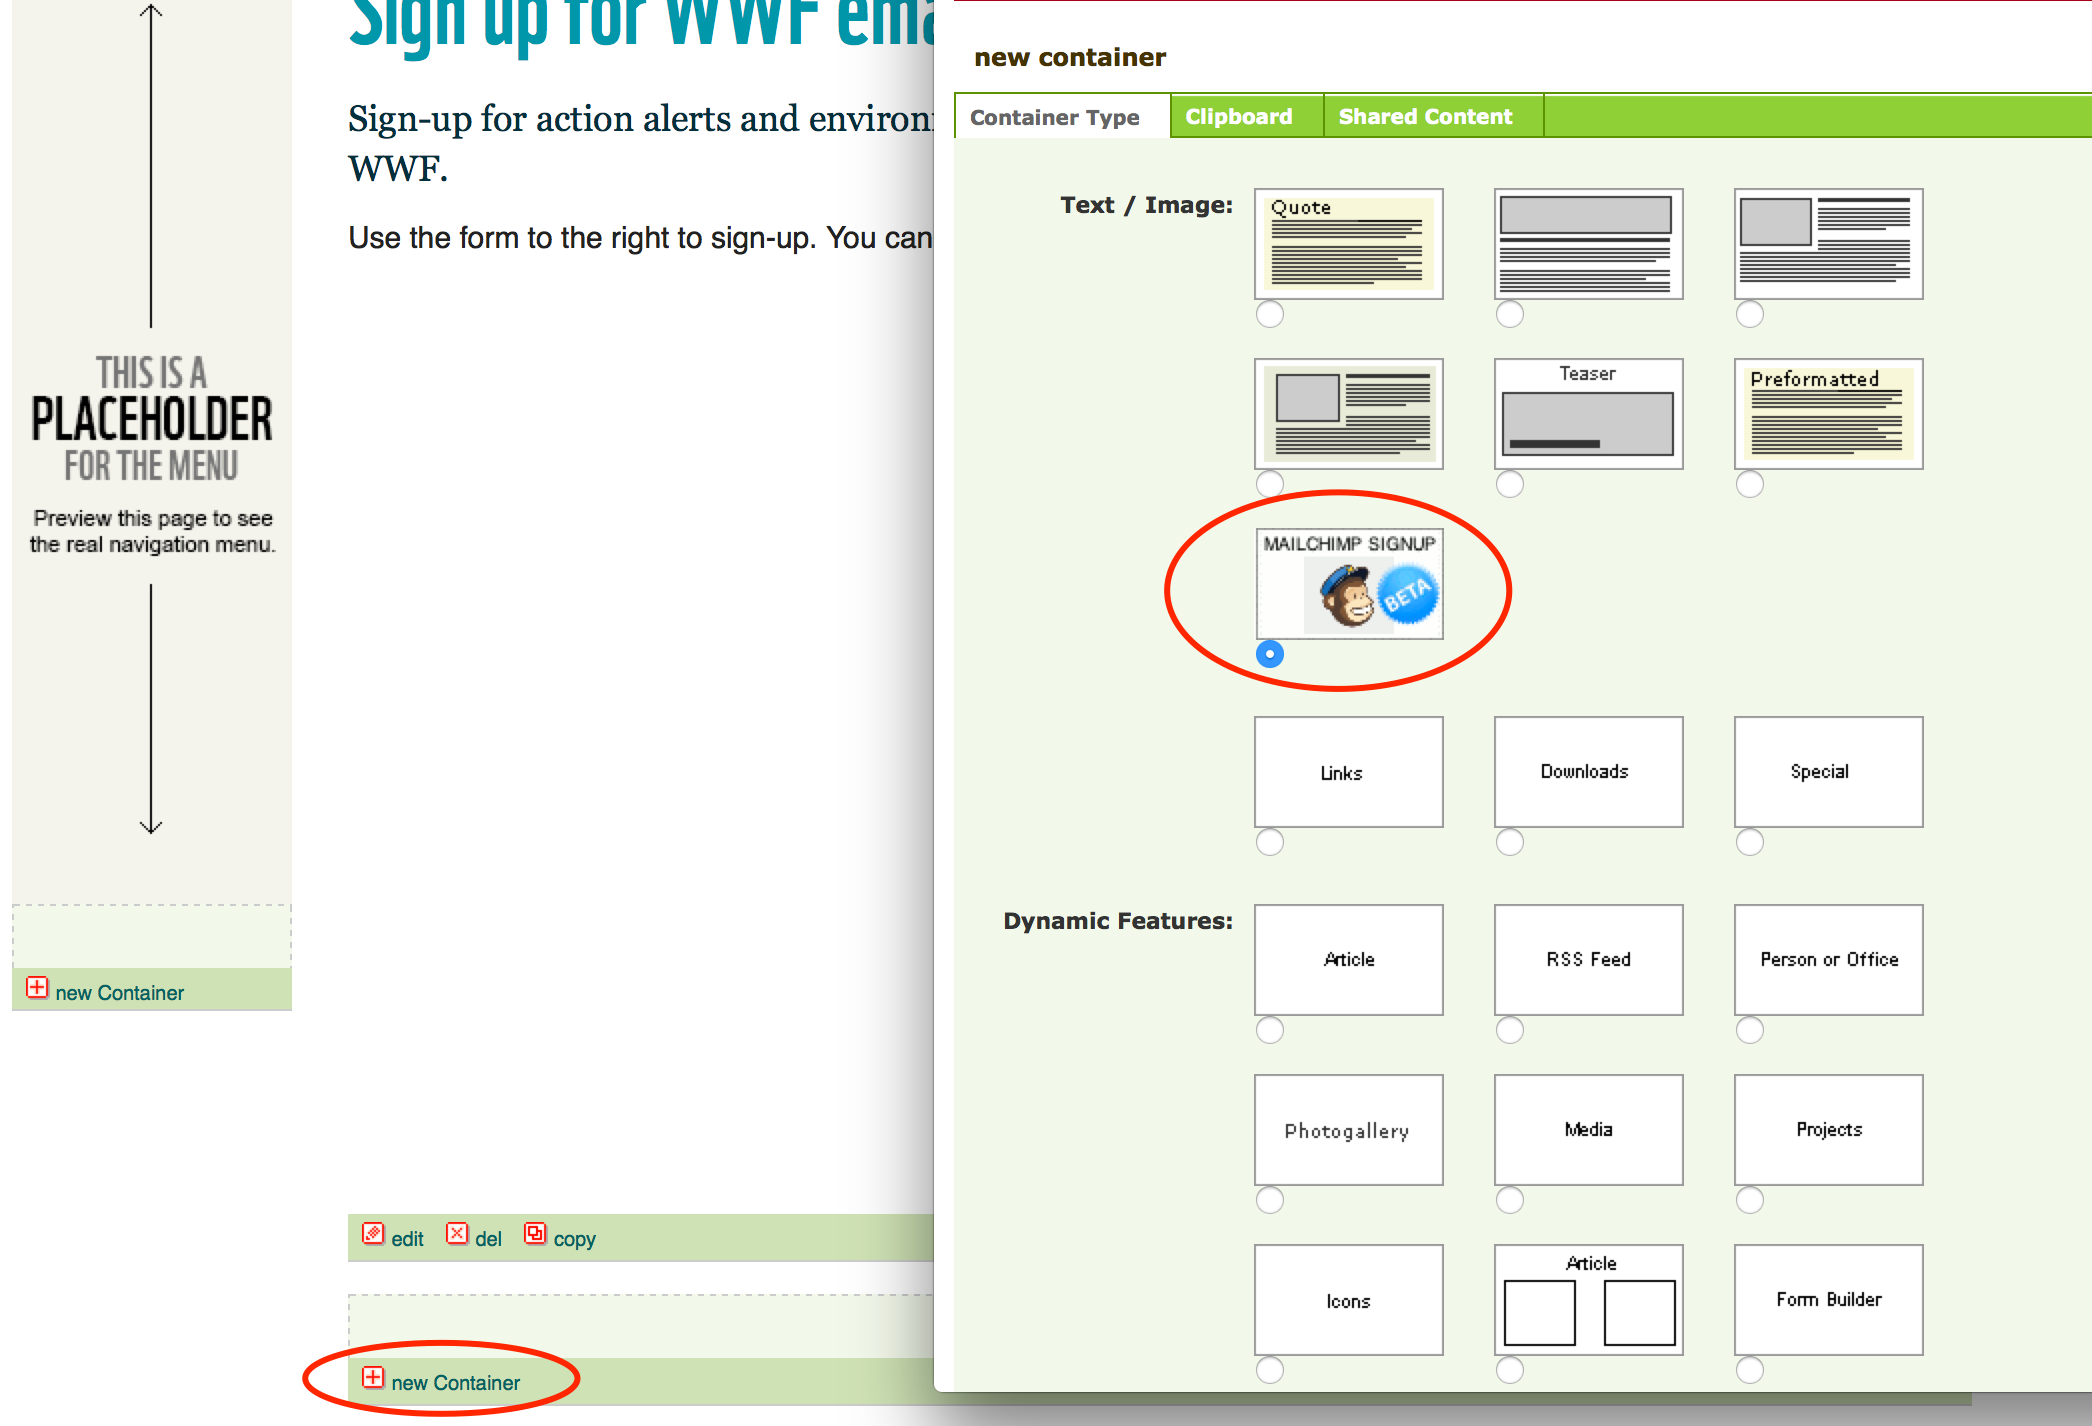 Create a new container in the CMS, and select the Mailchimp container like in the image above.
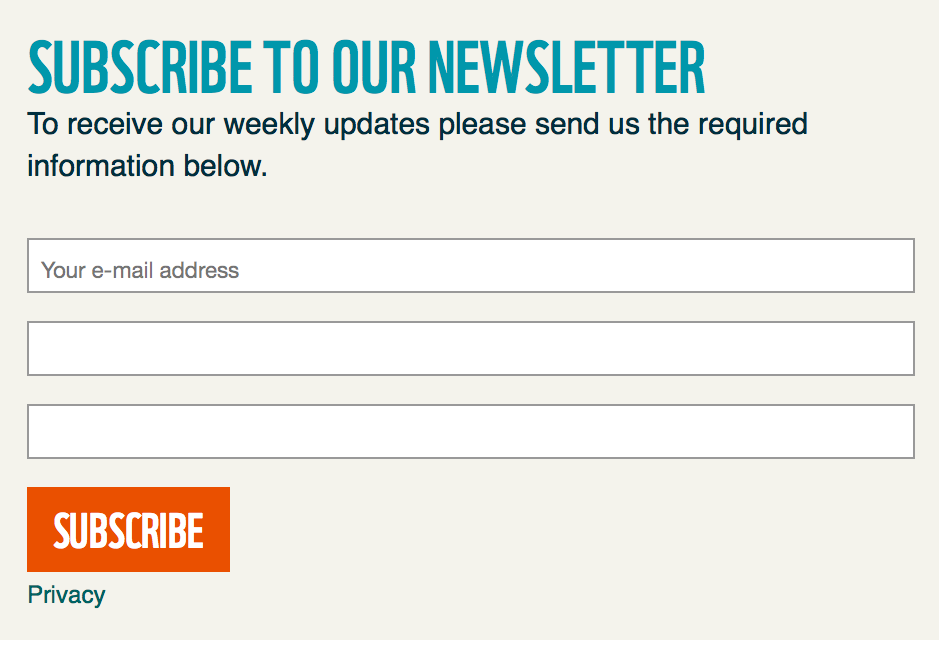
2. Add a title and description
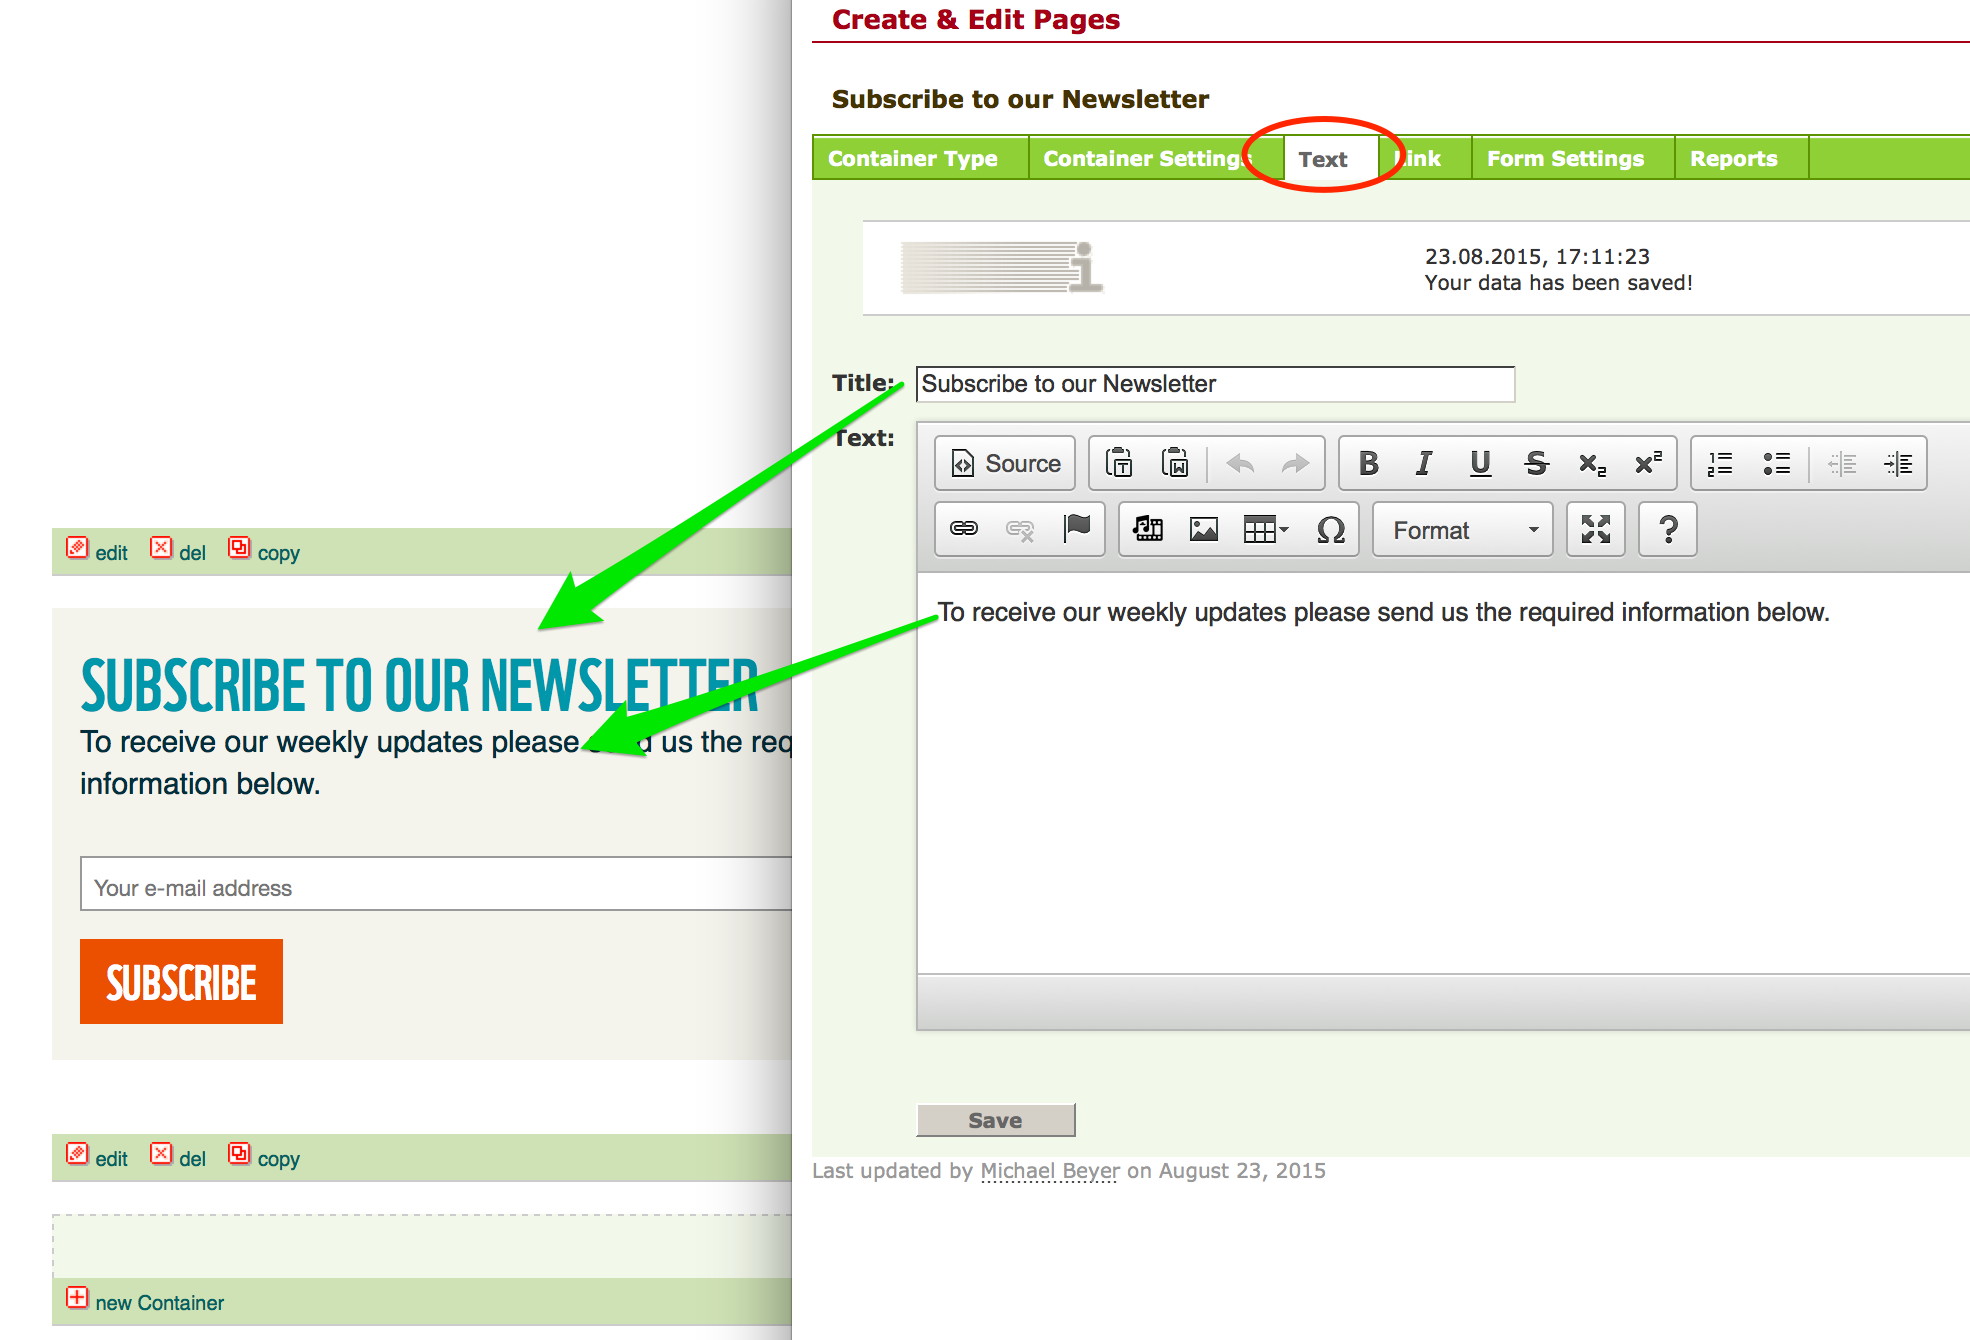 Navigate to the “Text” tab in the container screen. Title and description are optional. You can see in the preview above how it would look in the page template. After adding your text, click on the Save button.
3. Add a ‘Privacy’ link
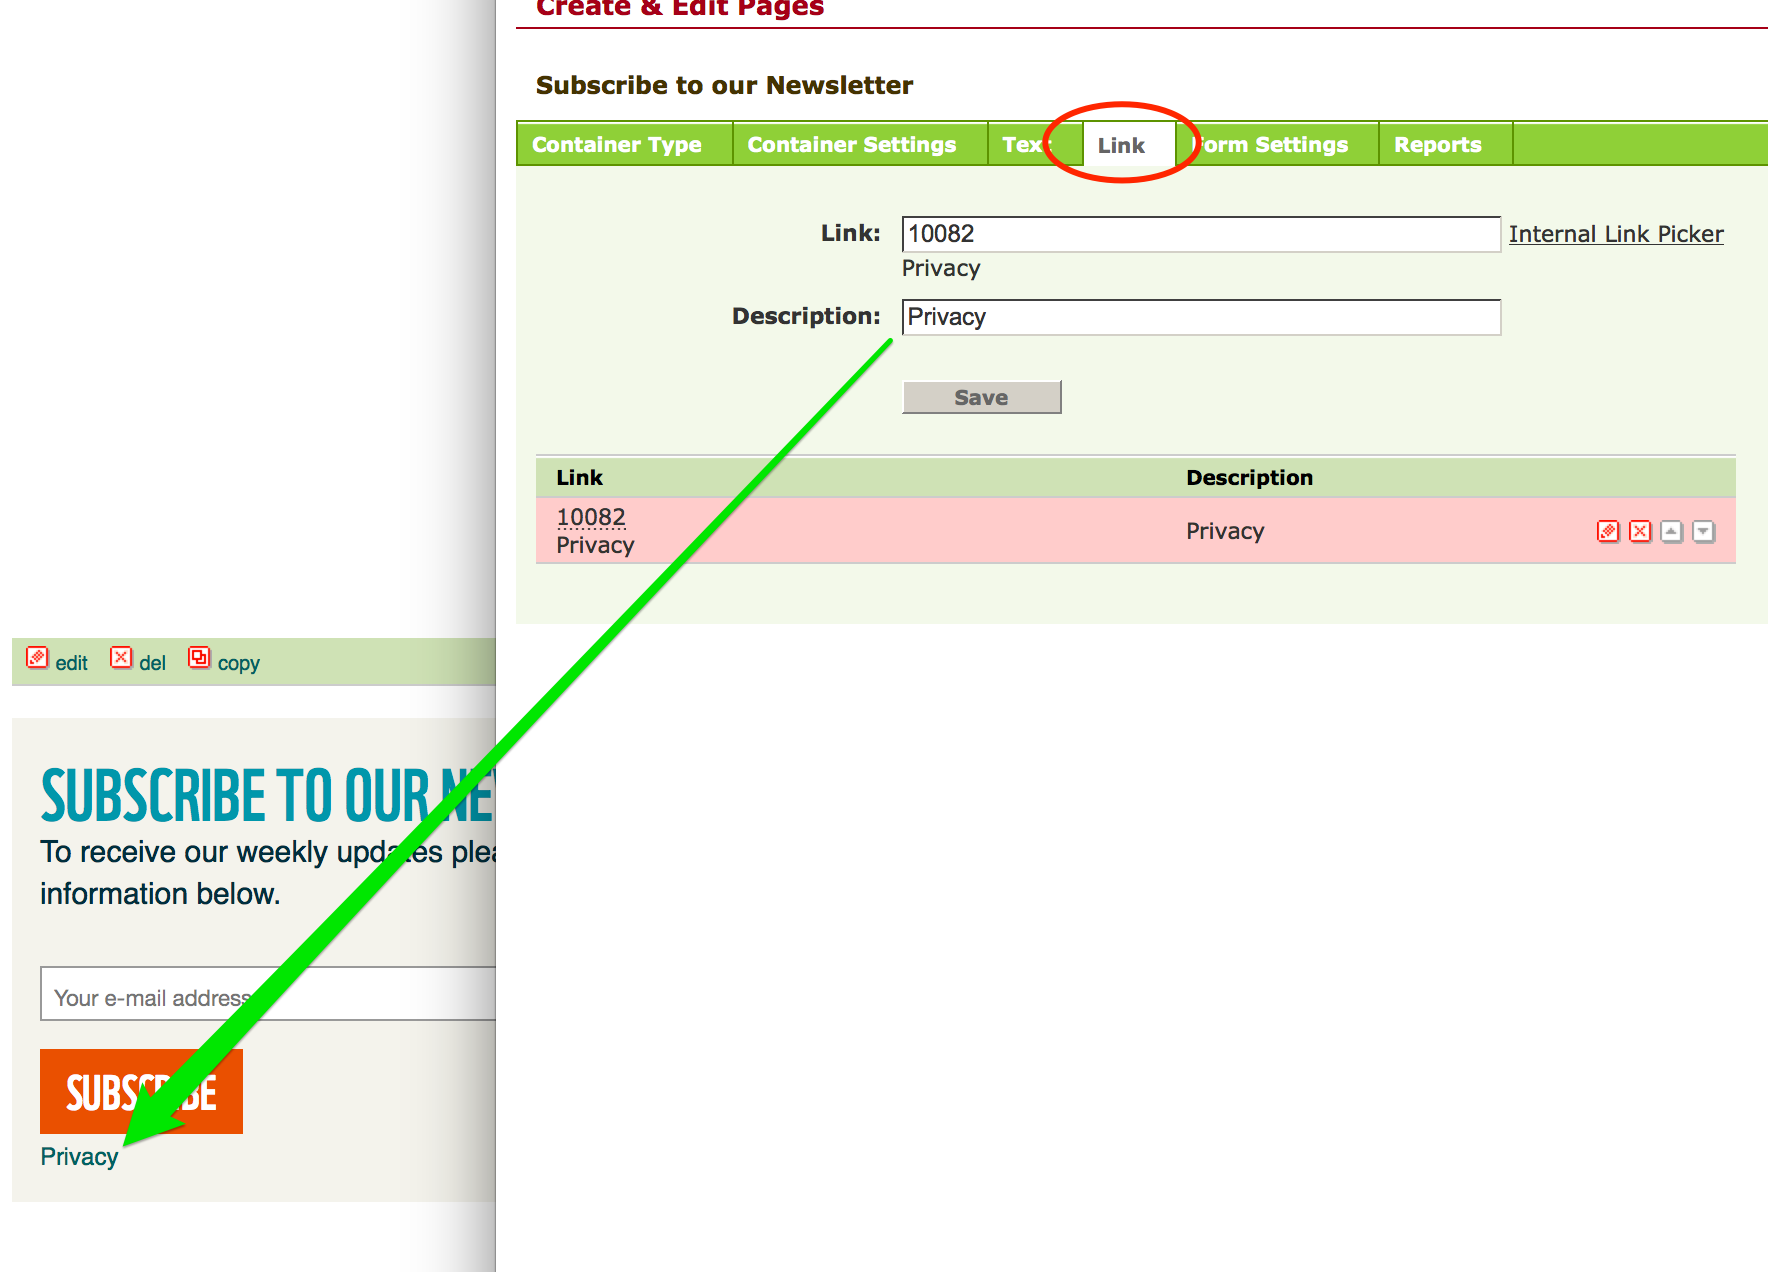 In case you want to add a ‘Privacy’ link, or any other link regarding the submission of user data, you can add it in the “Link” screen of the container. The link will appear below the Subscribe button, like in the preview above.
4. Create your Form in your Mailchimp account
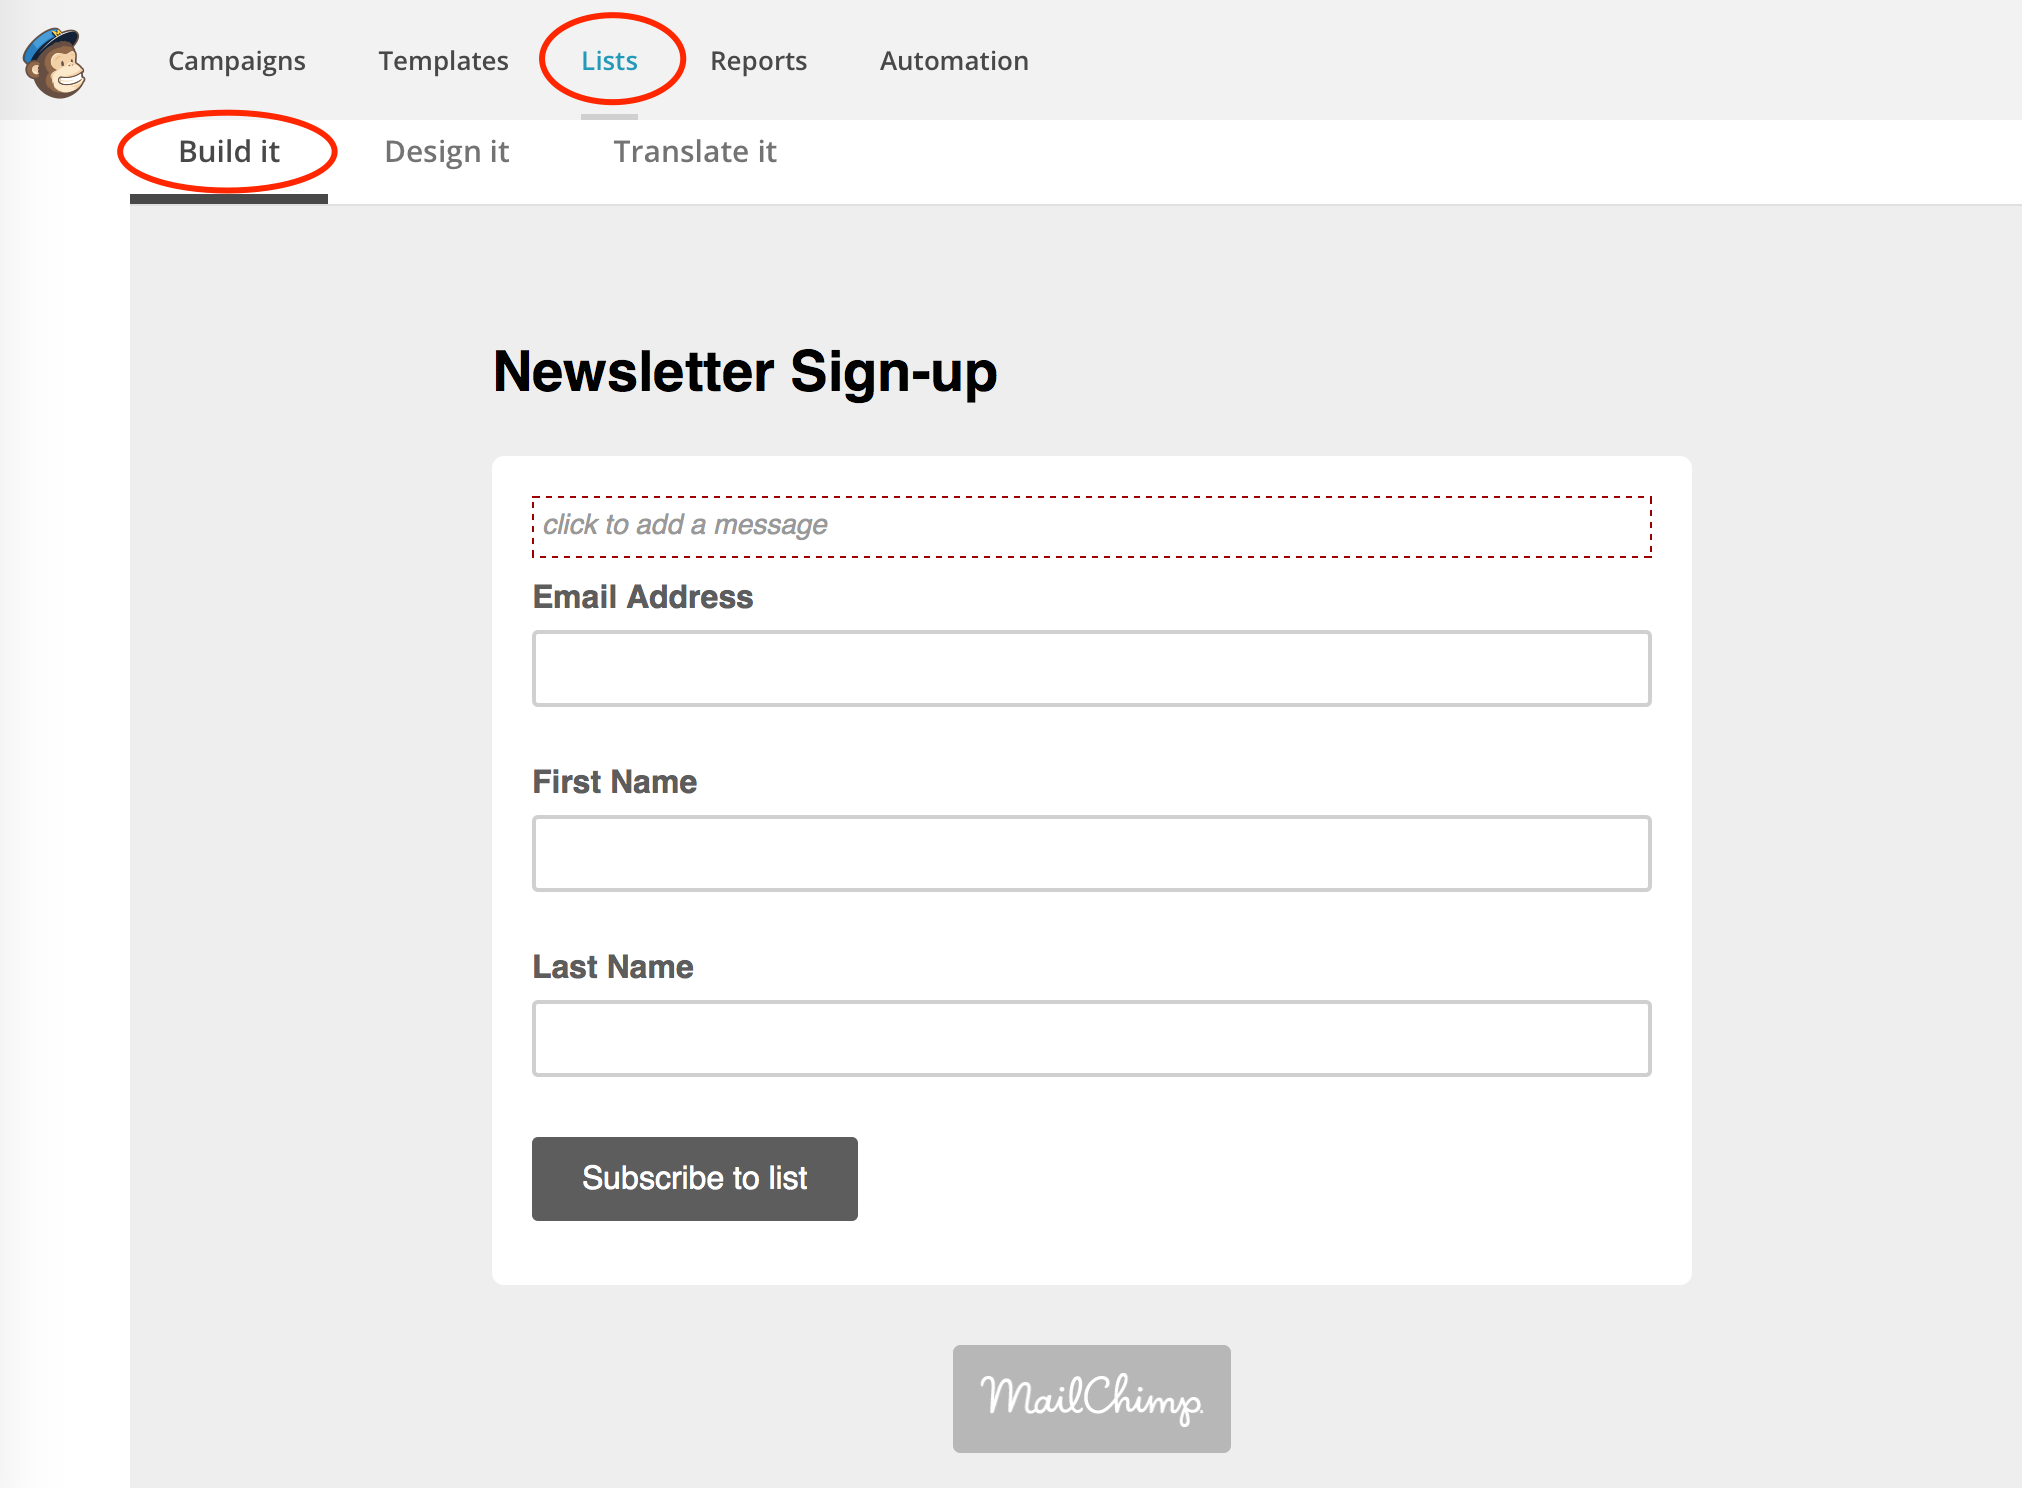 Go into your account at mailchimp.com, or create a new one. For up to 2,000 subscribers you can get a free account. Create the form that you want to embed into your CMS page, under “Lists” and then “Build it”. You can drag the fields form the right into the form and adjust labels and other settings. After your form is done, save it!
5. Go to your Account settings
 In order to connect your Mailchimp form with the container in the CMS, you have to get the API code. Click on your account name, and then select “Account”.
6. Go into the API keys
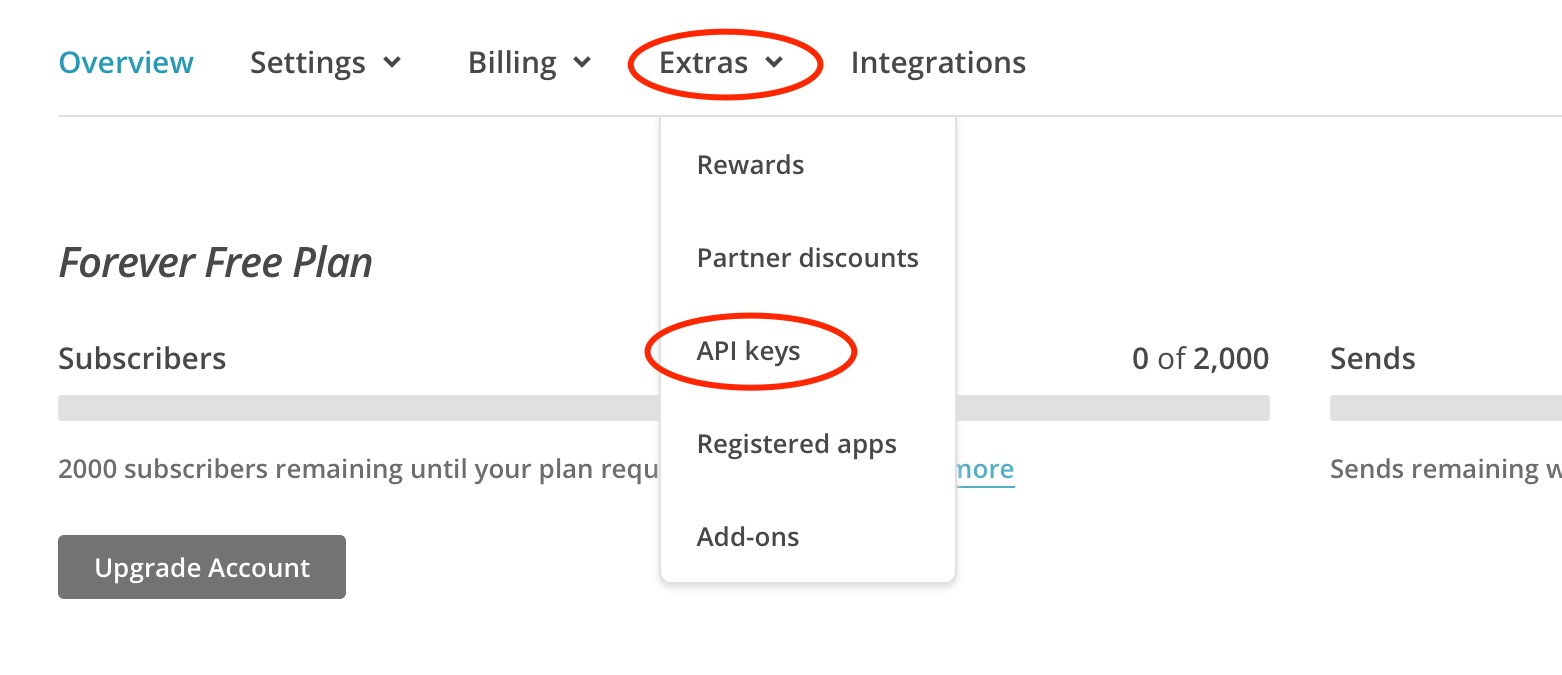 Click on “Extras” in the top menu and then select “API keys” in the submenu.
7. Copy API code
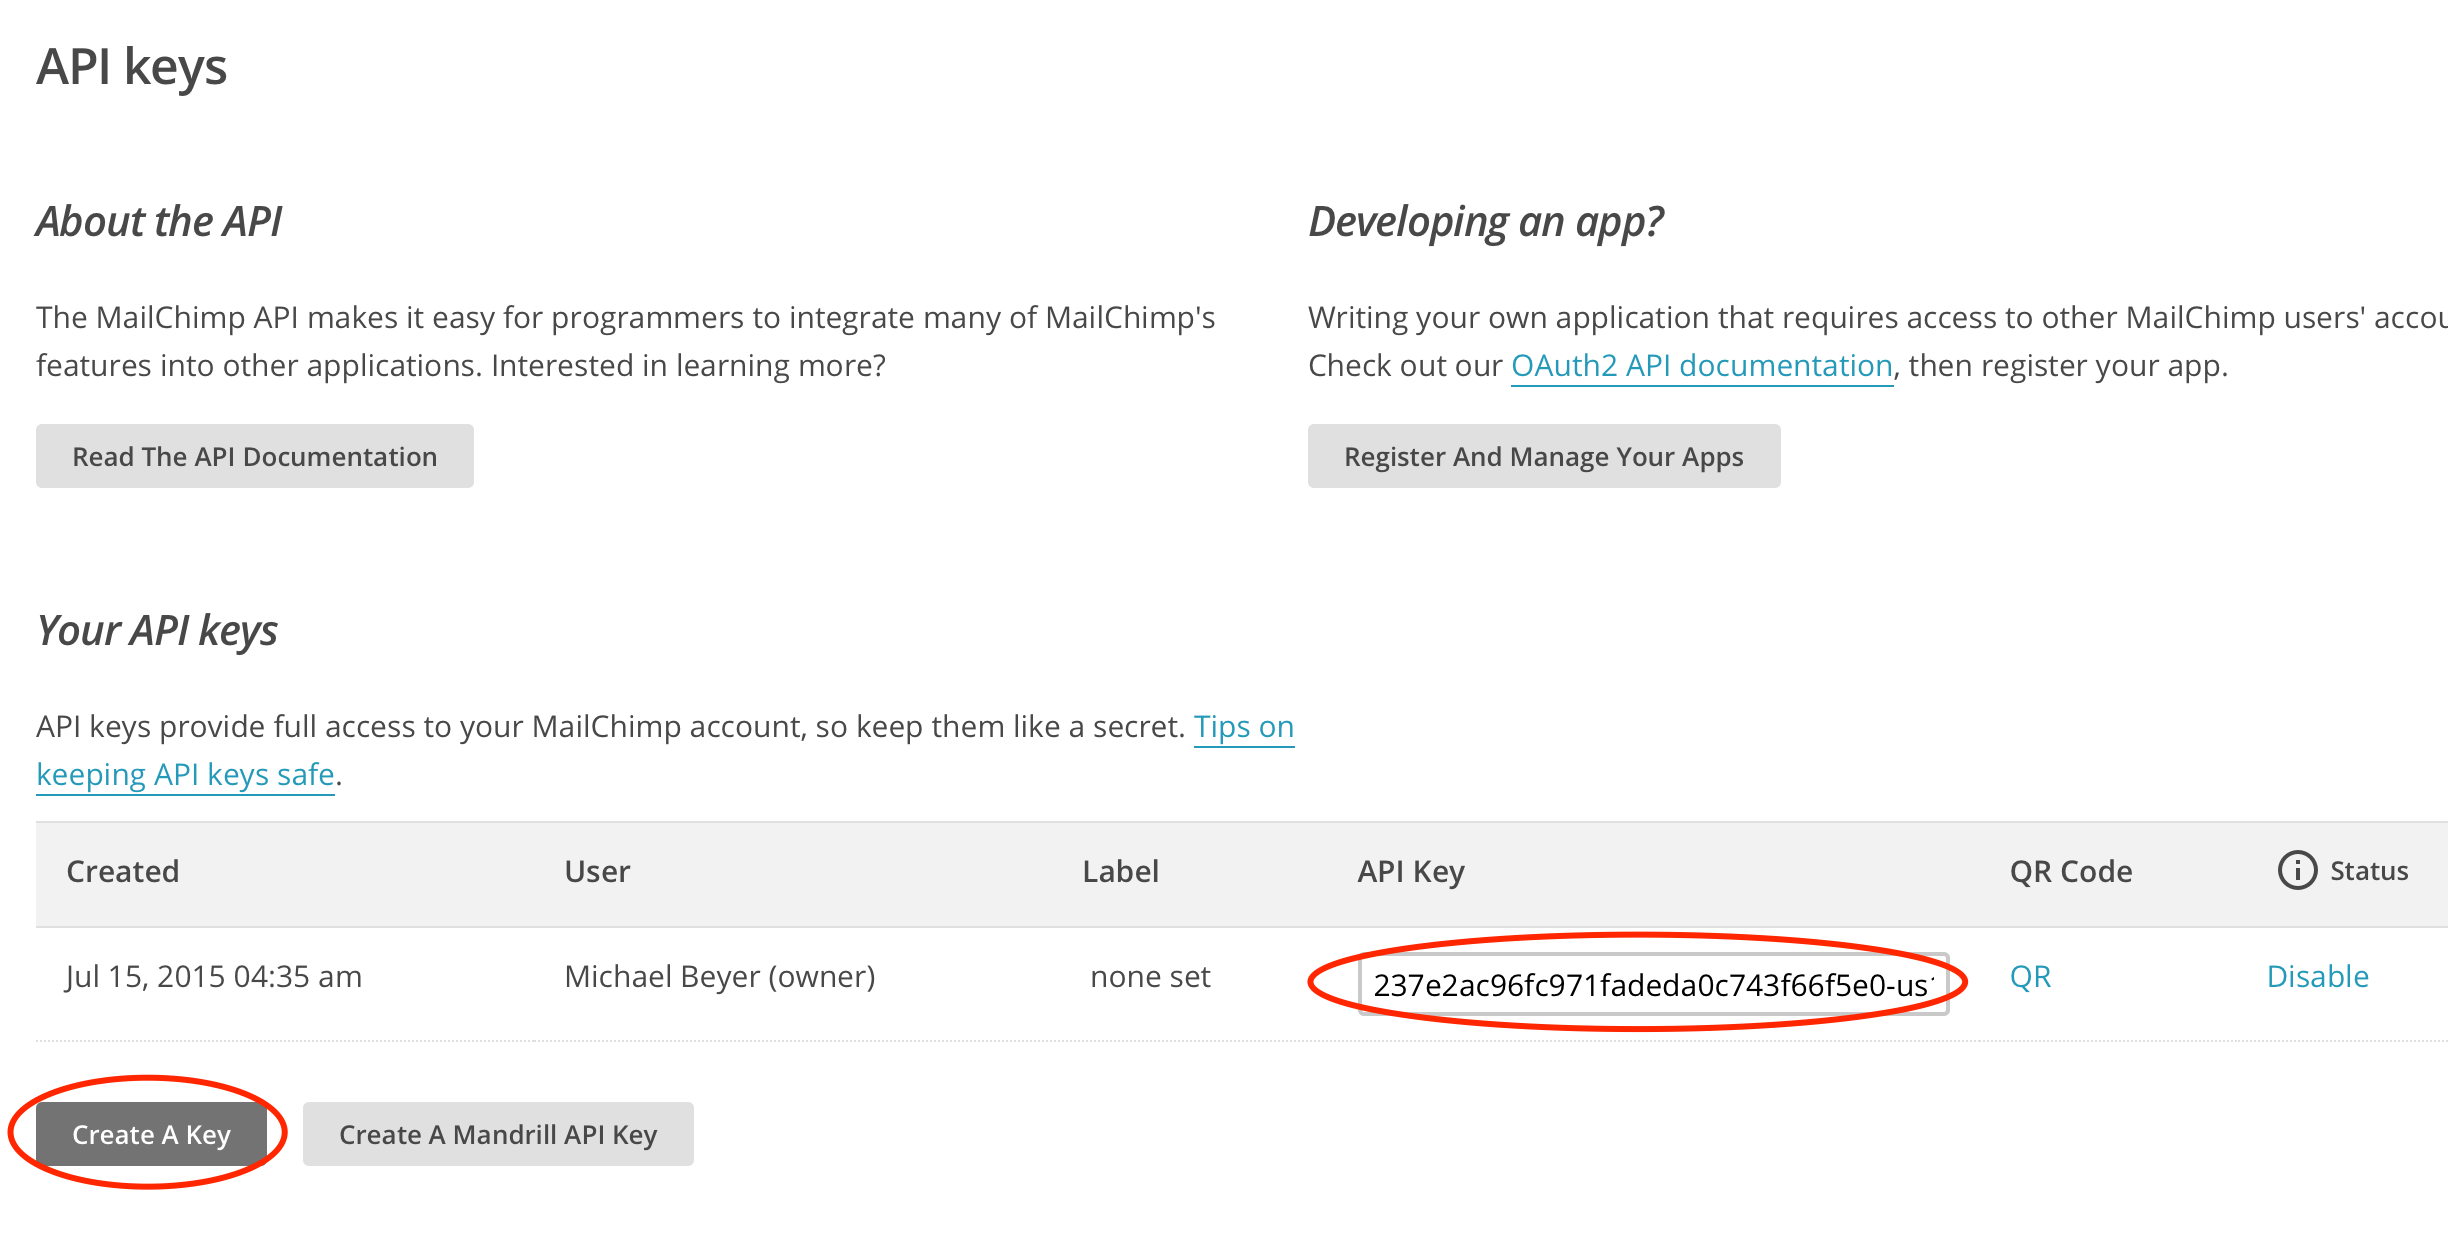 Select the API key and copy it. If you don’t have a key there yet, you can create your first one with the button below, and then copy it.
8. Enter API key into container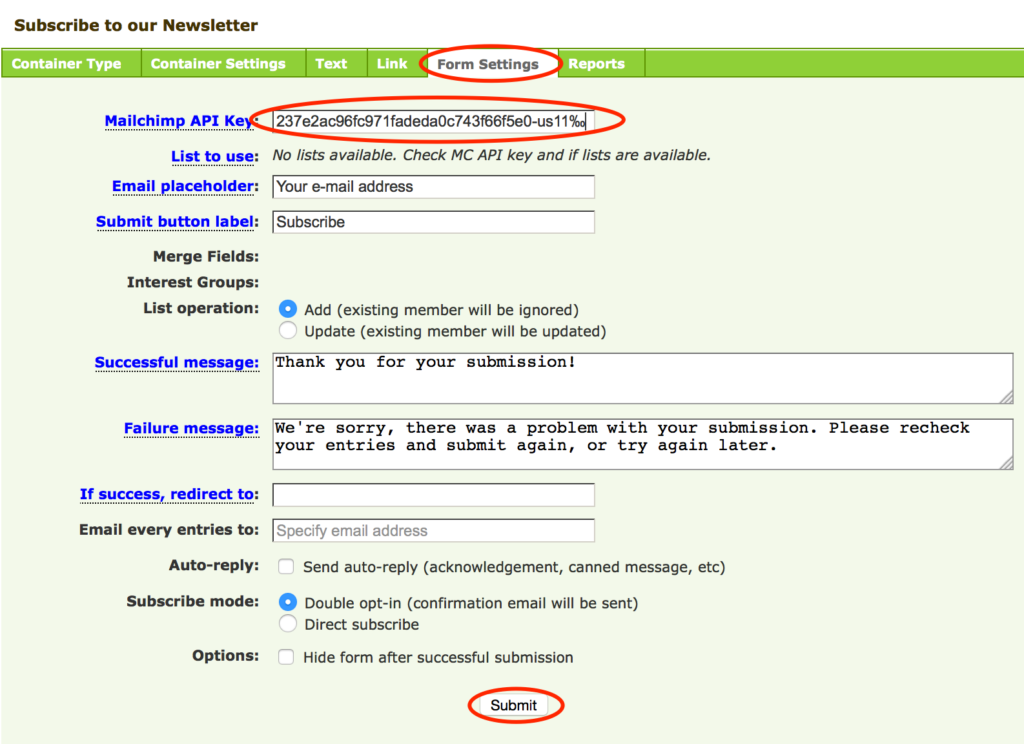
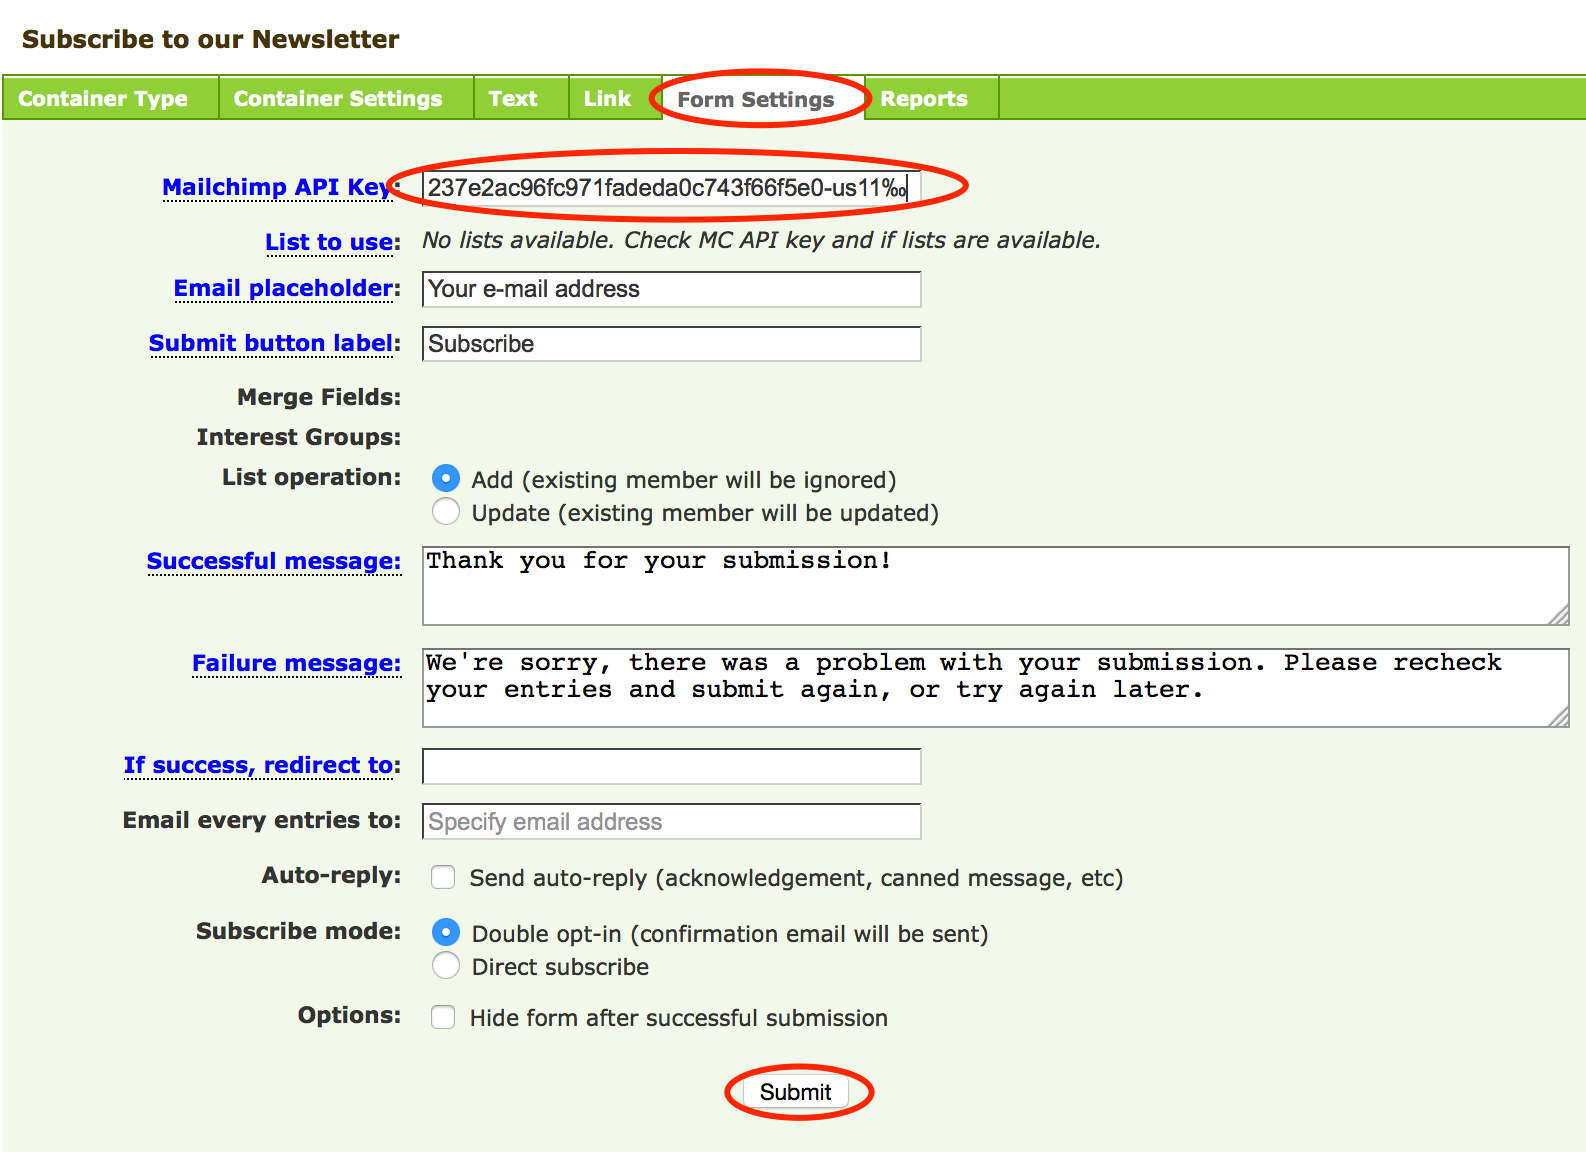
Go back to your container screen, select the tab “Form Settings”. In the first field, enter the API key that you copied from the Mailchimp account. Right now, your form is not yet connected. Go ahead and click on the Submit button at the bottom of the screen and skip any other settings until the next step.
9. Your form is connected!
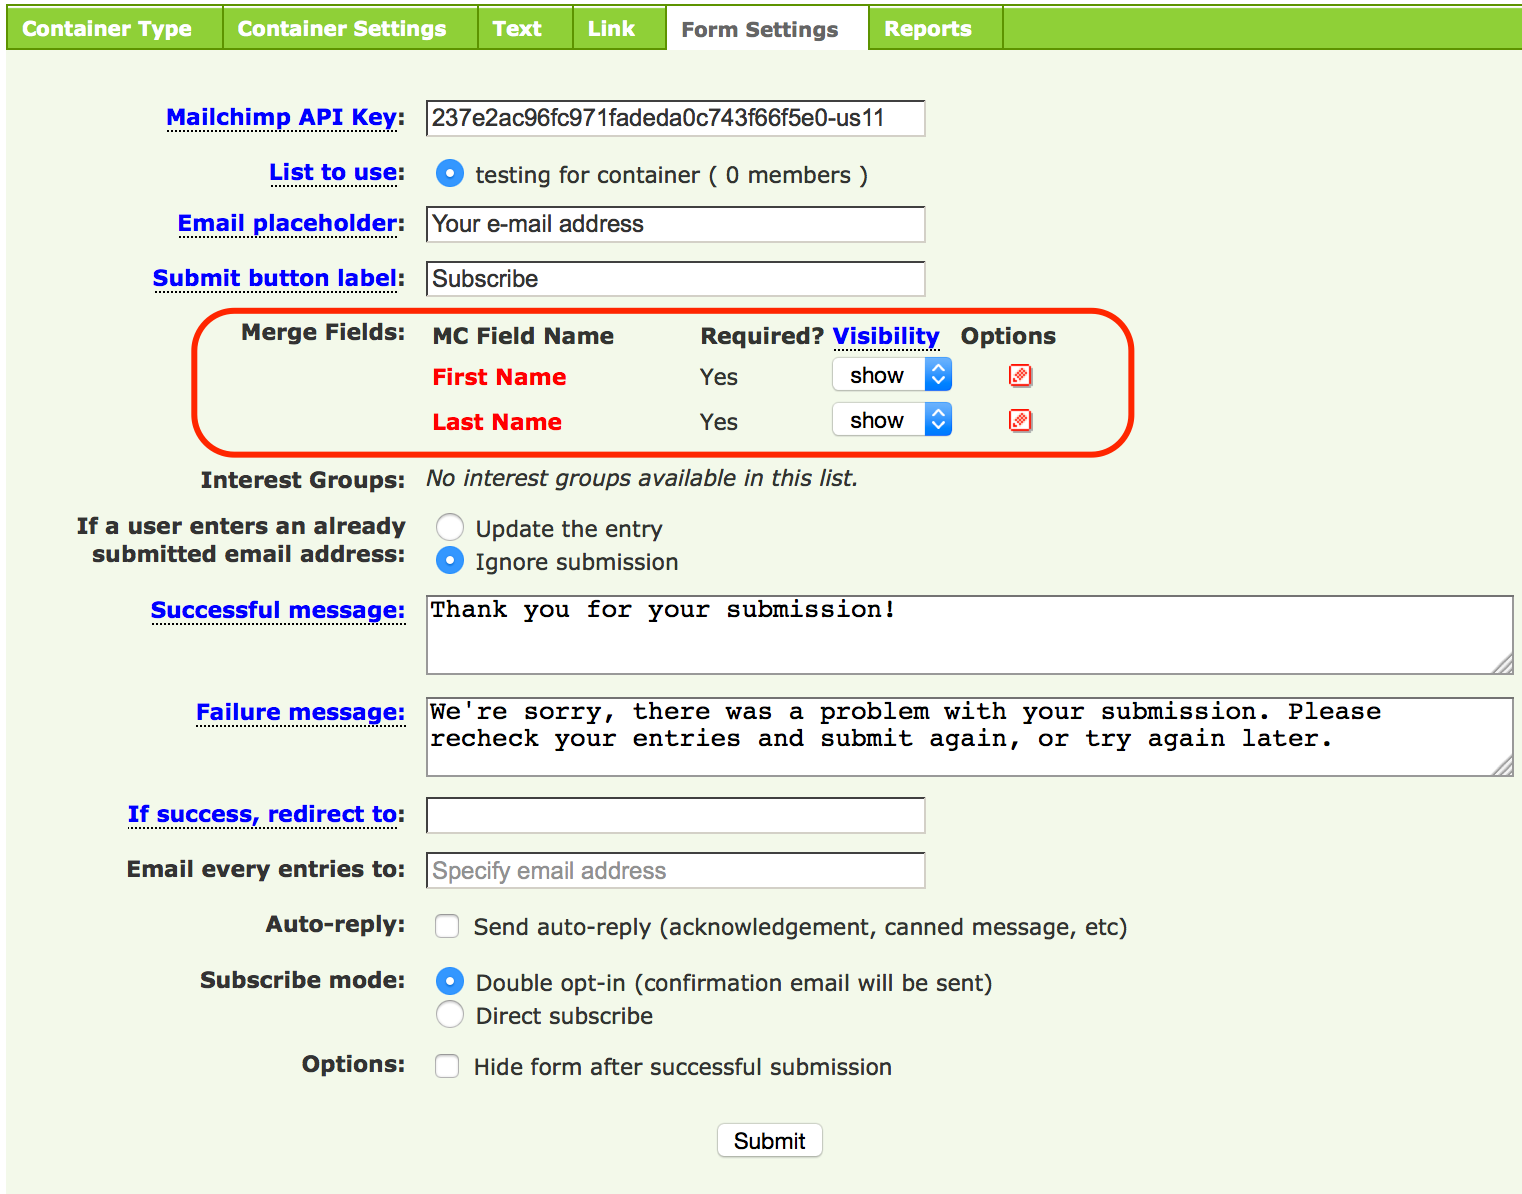
After the container settings reload, and you see the fields that you set up in the Mailchimp form, your container is connected with Mailchimp.
PLEASE NOTE: When you update your form in Mailchimp after it has already been added to your page, the changes will not automatically be sync'd to the page. After editing the form in mailchimp, reload the container settings to make sure it gets updated. Save the changes in the container and re-publish the page.
You can adjust the following settings:
- List to use: Select the list name that you want to use from your Mailchimp account.
- Submit button label: Write the word or text that the Send button should have.
- Merge fields: All the fields from your form, except the Email field (which is default) are listed here. You can choose if you want to show or hide specific fields and choose additional settings for each field.
- Double e-mail entries: You can choose what should happen if a user enters an email address that has already been submitted. Should the entry get updated with the new information, or should it just be ignored?
- Successful message: Write the text that should appear after the user sends the form successfully.
- Failure message: Write the text (including new instructions) when the submission has failed.
- Redirect (optional): Add the URL/link of the page where you want to link to, after the form is submitted.
- Email entries to: Add your Email address if you want to receive updates about every submission of the form.
- Auto-reply: check this option if you want to send an automatic email to the user who submitted the form. The specific settings can be selected in the Mailchimp account.
- Subscribe mode: Choose “Double opt-in” if you want the user to confirm his submission by clicking on a specific link in the email he will get. Select “Direct subscribe” if you want to skip the confirmation and add the user directly to the list.
- Options: Check the box if you want to hide the entire form after it has been submitted.
9. Send a submissions report
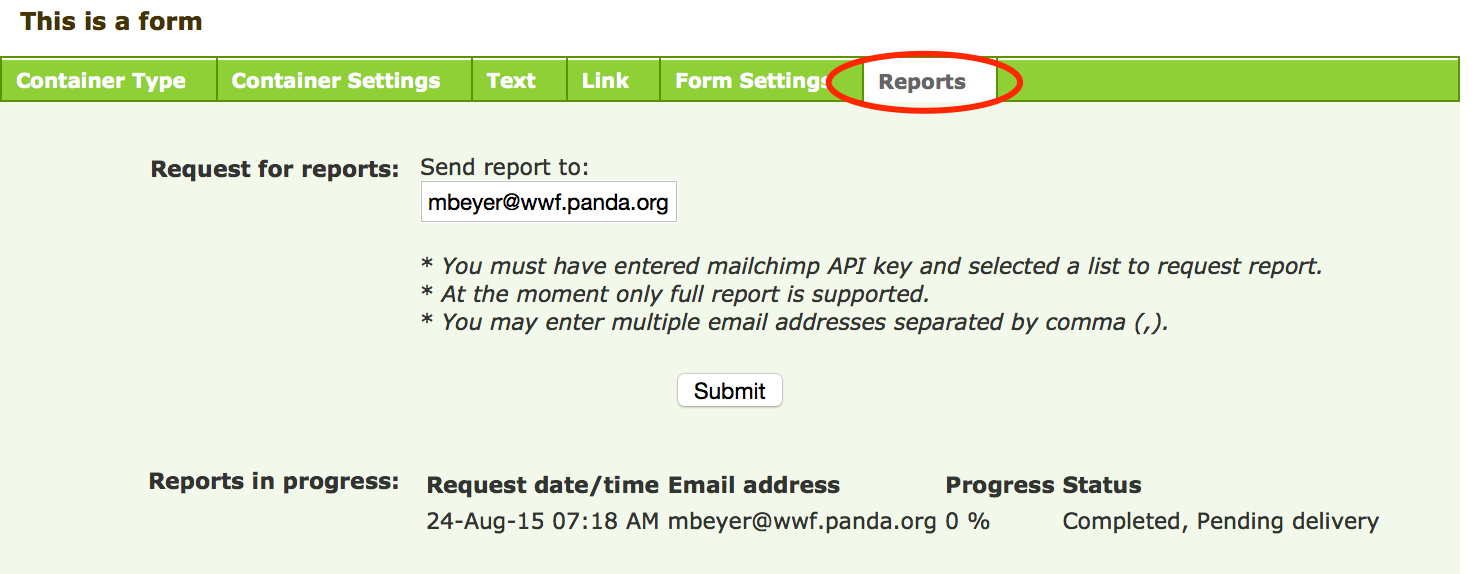
In the last option screen “Reports”, you can submit all the entries to an email address, or multiple email addresses (separate by comma). You can also download it from your Mailchimp account.
Note: if you use any "textarea" fields (fields that allow paragraphs of text, in multiple lines), the data should only be retrieved via the Reports screen in the CMS, because these fields will be ignored from the Mailchimp downloads.
On the bottom of this screen you will see a history of reports that have been submitted, and view the current progress of a report submission.
If you have any questions, please let us know by sending us a ticket to: support@wwfinternational.zendesk.com.